How to Install Pergola Post Brackets
If you're building a pergola, you will need to notice a mode to install your pergola posts. There is a simple manner to install footings (cheque out this commodity on installing deck footings) if y'all want to put the posts direct into the concrete, but many experts contend that for the long-term, installing post brackets into the concrete is the better pick. Brackets, which go along the forest post out of the physical, tend to extend the life and support of the mail service wood. This tutorial volition walk you through the straightforward process of installing brackets into concrete for mounting vi×6 pergola posts.
 View in gallery
  View in gallery
 For half-dozen×6 pergola posts, 12" concrete forms are recommended. Also, check your zone for the freeze depth to make up one's mind how deep your concrete support needs to be. In our zone, this is xxx" deep. Utilise a hand saw to cut the 12" concrete grade to size. Place the form into your dug hole.
 View in gallery
 Run strings every bit needed to determine the placement and/or alignment of your mail, and then check the bird's-middle view of the strings. Depending on the type of your bracket, be sure that the part of the subclass that will be extended into the physical is in the inner third of your concrete form. In this case, the 6×6 brackets take a central post.
 View in gallery
 Every bit y'all can run into on the second form, though, the bracket post volition not be in the inner third of the concrete grade, and so the hole needs to exist dug out and moved to the right.
 View in gallery
 Use a pry bar and/or shovel to make the hole bigger on that side. Clear out the dirt.
 View in gallery
 Place the concrete course back into the hole and bank check for the bracket placement. This is amend; every bit you tin run into, the post is in the rubber zone. Of course, perfectly centered is ever best. But that doesn't ever happen.
 View in gallery
 Spray an inch or two of h2o into the bottom of your concrete form.
 View in gallery
 Cascade some bags of fast-setting concrete into the concrete form. (You can add a picayune water in betwixt each purse, if you want.) It's of import to discover physical mix that is specifically for posts; this allows you to mix directly in the pigsty, rather than having to pre-mix in a bucket or wheelbarrow or any. It'south a very slick and user-friendly way to do concrete in an case like this.
 View in gallery
 Use the pry bar in an up-and-down movement to mix the pulverization and water. Remember that this concrete is fast-acting, true to its name, so you need to mix it thoroughly only quickly. This mixture is too watery at this signal.
 View in gallery
 Add water or small amounts of powder until the superlative is a semi-solid mixture that will concur the bracket in place. Call up, it doesn't need to be perfect. Don't take too much time getting the mixture "just correct," but be aware that the concrete needs to be able to support the bracket exactly every bit information technology sets and dries.
 View in gallery
 When the physical is ready, place a minor string with a very minor weight at the bottom of it on the corner joint of your strings.
 View in gallery
 Gravity will work in your favor, giving you a 3rd line for "leveling" the subclass – 2 up pinnacle at the bird's-eye view, and one hanging down from there.
 View in gallery
 Immediately push the subclass into the physical in as close to the actual placement as possible. Adapt as needed, but time is working against you from this signal on, and so exist quick.
 View in gallery
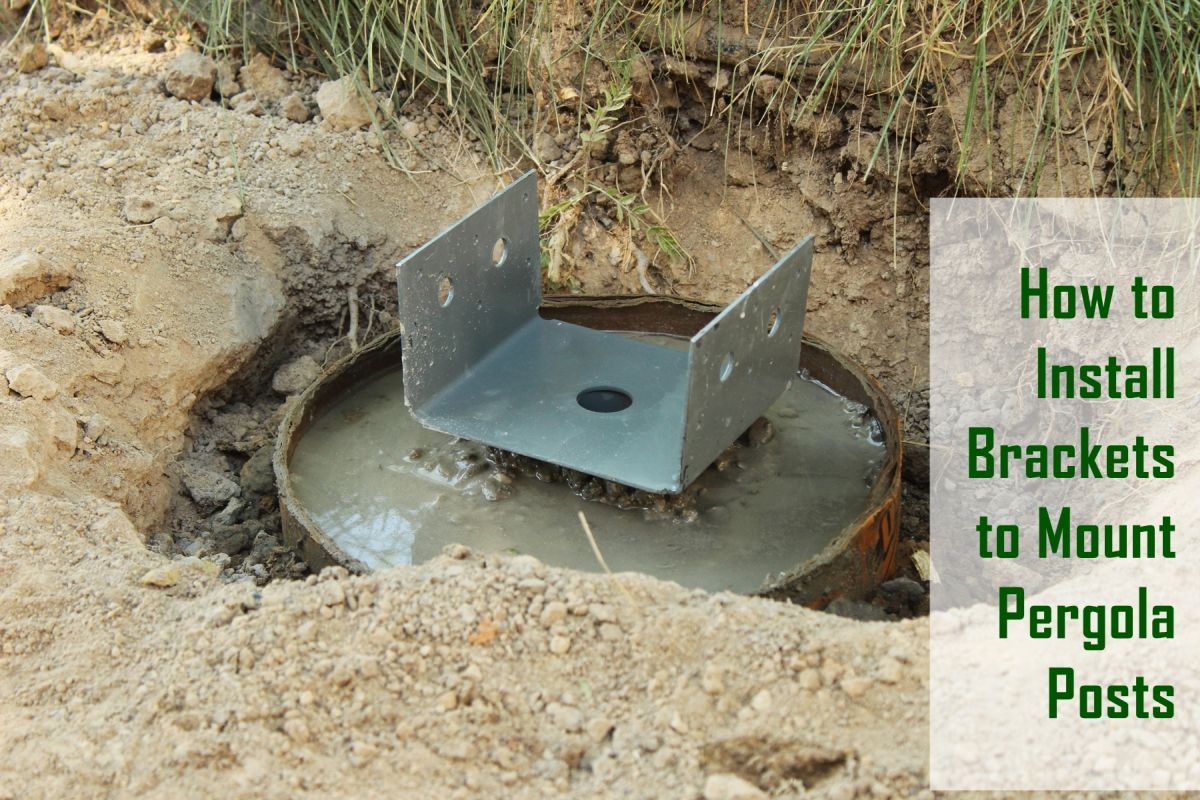
 When your bracket is perfectly positioned, utilize a small paw shovel to press concrete tightly upwards confronting the bracket post.
 View in gallery
 Yous tin can also slope the concrete away from the bracket post, or just to smoothen the physical flat if you want. Cheque everything for level one concluding time, so go out the bracket alone while the concrete dries and does its affair. Congratulations! Yous're one footstep closer to completing your pergola…a pace that is arguably the well-nigh important one, too. When the concrete is completely dry out, y'all'll exist prepare to mount your pergola posts.
Source: https://www.homedit.com/install-pergola-post-brackets/
0 Response to "How to Install Pergola Post Brackets"
Post a Comment